Android
ボトムシート
サーチ…
前書き
ボトムシートは、画面の下端から上にスライドするシートです。
備考
下のシートは、画面の下からスライドして、より多くのコンテンツを表示します。
それらはv23.2.0バージョンのAndroidサポートライブラリに追加されました。
GoogleマップのようなBottomSheetBehavior
この例は、サポートライブラリ23.4.0。+に依存しています。
BottomSheetBehaviorの特徴は次のとおりです。
- ボトムシートの動きに対応するアニメーションを備えた2つのツールバー。
- 「モーダルツールバー」に近づいたときに隠れるFAB(上にスライドして表示されるもの)。
- ボトムシートの背後にある背景画像で、何らかの視差効果があります。
- ツールバーのタイトル(TextView)は、ボトムシートに達すると表示されます。
- 通知のステータスバーは、背景を透明またはフルカラーにすることができます。
- 「アンカー」状態のカスタムボトムシート動作。
さあ、ひとつずつチェックしてみましょう:
ツールバー
Google Mapsでそのビューを開くと、検索できる場所にツールバーが表示されます。これは、私がGoogle Mapsとまったく同じようにしていない唯一のツールバーですとにかく、 ToolBarがAppBarLayout内にあり、 AppBarLayoutドラッグを開始すると非表示になり、BottomSheetがCOLLAPSED状態になったときに再び表示されます。
それを達成するには、次のことが必要です。
-
Behaviorを作成し、それをAppBarLayout.ScrollingViewBehaviorからAppBarLayout.ScrollingViewBehavior - 上書き
layoutDependsOnとonDependentViewChanged方法を。あなたはボトムシートの動きを聞きます。 - アニメーションを使用してAppBarLayout / ToolBarを非表示にする方法をいくつか作成します。
これは、最初のツールバーまたはActionBarで行った方法です。
@Override
public boolean layoutDependsOn(CoordinatorLayout parent, View child, View dependency) {
    return dependency instanceof NestedScrollView;
}

@Override
public boolean onDependentViewChanged(CoordinatorLayout parent, View child,
                                      View dependency) {

    if (mChild == null) {
        initValues(child, dependency);
        return false;
    }

    float dVerticalScroll = dependency.getY() - mPreviousY;
    mPreviousY = dependency.getY();

    //going up
    if (dVerticalScroll <= 0 && !hidden) {
        dismissAppBar(child);
        return true;
    }

    return false;
}

private void initValues(final View child, View dependency) {

    mChild = child;
    mInitialY = child.getY();

    BottomSheetBehaviorGoogleMapsLike bottomSheetBehavior = BottomSheetBehaviorGoogleMapsLike.from(dependency);
    bottomSheetBehavior.addBottomSheetCallback(new BottomSheetBehaviorGoogleMapsLike.BottomSheetCallback() {
        @Override
        public void onStateChanged(@NonNull View bottomSheet, @BottomSheetBehaviorGoogleMapsLike.State int newState) {
            if (newState == BottomSheetBehaviorGoogleMapsLike.STATE_COLLAPSED ||
                    newState == BottomSheetBehaviorGoogleMapsLike.STATE_HIDDEN)
                showAppBar(child);
        }

        @Override
        public void onSlide(@NonNull View bottomSheet, float slideOffset) {

        }
    });
}

private void dismissAppBar(View child){
    hidden = true;
    AppBarLayout appBarLayout = (AppBarLayout)child;
    mToolbarAnimation = appBarLayout.animate().setDuration(mContext.getResources().getInteger(android.R.integer.config_shortAnimTime));
    mToolbarAnimation.y(-(mChild.getHeight()+25)).start();
}

private void showAppBar(View child) {
    hidden = false;
    AppBarLayout appBarLayout = (AppBarLayout)child;
    mToolbarAnimation = appBarLayout.animate().setDuration(mContext.getResources().getInteger(android.R.integer.config_mediumAnimTime));
    mToolbarAnimation.y(mInitialY).start();
}
2番目のツールバーまたは「モーダル」ツールバー:
同じメソッドをオーバーライドする必要がありますが、ここではより多くのビヘイビアを処理する必要があります。
- アニメーションでツールバーを表示/非表示する
- ステータスバーの色/背景を変更する
- ツールバーのBottomSheetタイトルの表示/非表示
- ボトムシートを閉じるか、折りたたまれた状態に送信する
FAB
これもカスタムビヘイビアですが、 FloatingActionButton.BehaviorからFloatingActionButton.Behaviorます。でonDependentViewChangedあなたはそれがあなたがそれを隠したいところで「オフセット」またはポイントに達すると見ています。私の場合は、2番目のツールバーの近くにあるときに非表示にしたいので、FAB親(CoordinatorLayout)を調べ、ToolBarを含むAppBarLayoutを探し、OffSetのようなOffSet位置を使用します:
@Override
public boolean onDependentViewChanged(CoordinatorLayout parent, FloatingActionButton child, View dependency) {

    if (offset == 0)
        setOffsetValue(parent);

    if (dependency.getY() <=0)
        return false;

    if (child.getY() <= (offset + child.getHeight()) && child.getVisibility() == View.VISIBLE)
        child.hide();
    else if (child.getY() > offset && child.getVisibility() != View.VISIBLE)
        child.show();

    return false;
}
視差効果を持つBottomSheetの背後にある画像 :
他のものと同様、これはカスタム動作です。この中の唯一の「複雑な」ものは、BottomSheetに固定された画像を保持し、デフォルトの視差効果のような画像の崩壊を避ける小さなアルゴリズムです。
@Override
public boolean onDependentViewChanged(CoordinatorLayout parent, View child,
                                      View dependency) {

    if (mYmultiplier == 0) {
        initValues(child, dependency);
        return true;
    }

    float dVerticalScroll = dependency.getY() - mPreviousY;
    mPreviousY = dependency.getY();

    //going up
    if (dVerticalScroll <= 0 && child.getY() <= 0) {
        child.setY(0);
        return true;
    }

    //going down
    if (dVerticalScroll >= 0 && dependency.getY() <= mImageHeight)
        return false;

    child.setY( (int)(child.getY() + (dVerticalScroll * mYmultiplier) ) );

    return true;
}
今度は最後に: Custom BottomSheet Behavior
3つのステップを実行するには、まずデフォルトのBottomSheetBehaviorにSTATE_DRAGGING, STATE_SETTLING, STATE_EXPANDED, STATE_COLLAPSED, STATE_HIDDEN 5つの状態があり、Googleマップの動作では折りたたみと展開の中間の状態を追加する必要があることを理解しておく必要があります: STATE_ANCHOR_POINT
私は、デフォルトのbottomSheetBehaviorを成功させずに拡張しようとしたので、すべてのコードを貼り付けてコピーし、必要なものを修正しました。
私が話していることを達成するには、次のステップに従ってください:
Javaクラスを作成し、
CoordinatorLayout.Behavior<V>から拡張しますCoordinatorLayout.Behavior<V>ペーストコードをデフォルトの
BottomSheetBehaviorファイルから新しいものにコピーします。次のコードを
clampViewPositionVerticalして、clampViewPositionVerticalメソッドを変更します。@Override public int clampViewPositionVertical(View child, int top, int dy) { return constrain(top, mMinOffset, mHideable ? mParentHeight : mMaxOffset); } int constrain(int amount, int low, int high) { return amount < low ? low : (amount > high ? high : amount); }新しい状態を追加する
パブリックstatic final int STATE_ANCHOR_POINT = X;
次のメソッドを変更します:
onLayoutChild、onStopNestedScroll、BottomSheetBehavior<V> from(V view)およびsetState(オプション)
public boolean onLayoutChild(CoordinatorLayout parent, V child, int layoutDirection) {
    // First let the parent lay it out
    if (mState != STATE_DRAGGING && mState != STATE_SETTLING) {
        if (ViewCompat.getFitsSystemWindows(parent) &&
                !ViewCompat.getFitsSystemWindows(child)) {
            ViewCompat.setFitsSystemWindows(child, true);
        }
        parent.onLayoutChild(child, layoutDirection);
    }
    // Offset the bottom sheet
    mParentHeight = parent.getHeight();
    mMinOffset = Math.max(0, mParentHeight - child.getHeight());
    mMaxOffset = Math.max(mParentHeight - mPeekHeight, mMinOffset);

    //if (mState == STATE_EXPANDED) {
    //    ViewCompat.offsetTopAndBottom(child, mMinOffset);
    //} else if (mHideable && mState == STATE_HIDDEN...
    if (mState == STATE_ANCHOR_POINT) {
        ViewCompat.offsetTopAndBottom(child, mAnchorPoint);
    } else if (mState == STATE_EXPANDED) {
        ViewCompat.offsetTopAndBottom(child, mMinOffset);
    } else if (mHideable && mState == STATE_HIDDEN) {
        ViewCompat.offsetTopAndBottom(child, mParentHeight);
    } else if (mState == STATE_COLLAPSED) {
        ViewCompat.offsetTopAndBottom(child, mMaxOffset);
    }
    if (mViewDragHelper == null) {
        mViewDragHelper = ViewDragHelper.create(parent, mDragCallback);
    }
    mViewRef = new WeakReference<>(child);
    mNestedScrollingChildRef = new WeakReference<>(findScrollingChild(child));
    return true;
}


public void onStopNestedScroll(CoordinatorLayout coordinatorLayout, V child, View target) {
    if (child.getTop() == mMinOffset) {
        setStateInternal(STATE_EXPANDED);
        return;
    }
    if (target != mNestedScrollingChildRef.get() || !mNestedScrolled) {
        return;
    }
    int top;
    int targetState;
    if (mLastNestedScrollDy > 0) {
        //top = mMinOffset;
        //targetState = STATE_EXPANDED;
        int currentTop = child.getTop();
        if (currentTop > mAnchorPoint) {
            top = mAnchorPoint;
            targetState = STATE_ANCHOR_POINT;
        }
        else {
            top = mMinOffset;
            targetState = STATE_EXPANDED;
        }
    } else if (mHideable && shouldHide(child, getYVelocity())) {
        top = mParentHeight;
        targetState = STATE_HIDDEN;
    } else if (mLastNestedScrollDy == 0) {
        int currentTop = child.getTop();
        if (Math.abs(currentTop - mMinOffset) < Math.abs(currentTop - mMaxOffset)) {
            top = mMinOffset;
            targetState = STATE_EXPANDED;
        } else {
            top = mMaxOffset;
            targetState = STATE_COLLAPSED;
        }
    } else {
        //top = mMaxOffset;
        //targetState = STATE_COLLAPSED;
        int currentTop = child.getTop();
        if (currentTop > mAnchorPoint) {
            top = mMaxOffset;
            targetState = STATE_COLLAPSED;
        }
        else {
            top = mAnchorPoint;
            targetState = STATE_ANCHOR_POINT;
        }
    }
    if (mViewDragHelper.smoothSlideViewTo(child, child.getLeft(), top)) {
        setStateInternal(STATE_SETTLING);
        ViewCompat.postOnAnimation(child, new SettleRunnable(child, targetState));
    } else {
        setStateInternal(targetState);
    }
    mNestedScrolled = false;
}

public final void setState(@State int state) {
    if (state == mState) {
        return;
    }
    if (mViewRef == null) {
        // The view is not laid out yet; modify mState and let onLayoutChild handle it later
        /**
         * New behavior (added: state == STATE_ANCHOR_POINT ||)
         */
        if (state == STATE_COLLAPSED || state == STATE_EXPANDED ||
                state == STATE_ANCHOR_POINT ||
                (mHideable && state == STATE_HIDDEN)) {
            mState = state;
        }
        return;
    }
    V child = mViewRef.get();
    if (child == null) {
        return;
    }
    int top;
    if (state == STATE_COLLAPSED) {
        top = mMaxOffset;
    } else if (state == STATE_ANCHOR_POINT) {
        top = mAnchorPoint;
    } else if (state == STATE_EXPANDED) {
        top = mMinOffset;
    } else if (mHideable && state == STATE_HIDDEN) {
        top = mParentHeight;
    } else {
        throw new IllegalArgumentException("Illegal state argument: " + state);
    }
    setStateInternal(STATE_SETTLING);
    if (mViewDragHelper.smoothSlideViewTo(child, child.getLeft(), top)) {
        ViewCompat.postOnAnimation(child, new SettleRunnable(child, state));
    }
}


public static <V extends View> BottomSheetBehaviorGoogleMapsLike<V> from(V view) {
    ViewGroup.LayoutParams params = view.getLayoutParams();
    if (!(params instanceof CoordinatorLayout.LayoutParams)) {
        throw new IllegalArgumentException("The view is not a child of CoordinatorLayout");
    }
    CoordinatorLayout.Behavior behavior = ((CoordinatorLayout.LayoutParams) params)
            .getBehavior();
    if (!(behavior instanceof BottomSheetBehaviorGoogleMapsLike)) {
        throw new IllegalArgumentException(
                "The view is not associated with BottomSheetBehaviorGoogleMapsLike");
    }
    return (BottomSheetBehaviorGoogleMapsLike<V>) behavior;
}
すべてのカスタムビヘイビアを表示できるプロジェクト全体にリンクする
そして、それはそれがどのように見えるかです:
[  ]
]
クイックセットアップ
依存関係の下でアプリケーションのbuild.gradleファイルに次の依存関係が追加されていることを確認してください。
compile 'com.android.support:design:25.3.1'
次に、次のオプションを使用してボトムシートを使用できます。
-
CoordinatorLayoutで使用するBottomSheetBehavior -
BottomSheetDialogはボトムシートのビヘイビアを持つダイアログです -
BottomSheetDialogFragmentはDialogFragment拡張であり、標準ダイアログの代わりにBottomSheetDialogを作成します。
永続的なボトムシート
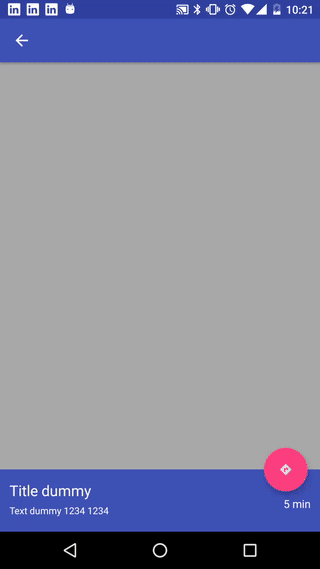
あなたはCoordinatorLayout子ビューにBottomSheetBehaviorを付けるPersistent Bottom Sheetを得ることができます:
<android.support.design.widget.CoordinatorLayout >

    <!-- .....   -->

    <LinearLayout
       android:id="@+id/bottom_sheet"
       android:elevation="4dp"
       android:minHeight="120dp"
       app:behavior_peekHeight="120dp"
       ...
       app:layout_behavior="android.support.design.widget.BottomSheetBehavior">

           <!-- .....   -->

       </LinearLayout>

</android.support.design.widget.CoordinatorLayout>
次に、コード内で次のように参照を作成することができます。
 // The View with the BottomSheetBehavior
 View bottomSheet = coordinatorLayout.findViewById(R.id.bottom_sheet);
 BottomSheetBehavior mBottomSheetBehavior = BottomSheetBehavior.from(bottomSheet);
setState()メソッドを使用して、 BottomSheetBehaviorの状態を設定できます。
mBottomSheetBehavior.setState(BottomSheetBehavior.STATE_EXPANDED);
次のいずれかの状態を使用できます。
STATE_COLLAPSED:この折りたたまれた状態はデフォルトであり、レイアウトの一部だけが下に沿って表示されます。高さは、app:behavior_peekHeight属性(デフォルトは0)で制御できます。STATE_EXPANDED:ボトムシートの完全に展開された状態。ボトムシート全体が表示されます(高さがCoordinatorLayoutを含む場合)。またはCoordinatorLayout全体が塗りつぶされている場合STATE_HIDDEN:デフォルトでは無効になっており(app:behavior_hideable属性で有効になっています)、これを有効にすると下のシートを下にスワイプして下のシートを完全に隠すことができます
状態変更のコールバックを受信したい場合は、 BottomSheetCallbackを追加することができます:
mBottomSheetBehavior.setBottomSheetCallback(new BottomSheetCallback() {
    @Override
    public void onStateChanged(@NonNull View bottomSheet, int newState) {
      // React to state change
    }
      @Override
      public void onSlide(@NonNull View bottomSheet, float slideOffset) {
       // React to dragging events
   }
 });
BottomSheetDialogFragmentを持つモーダルボトムシート
BottomSheetDialogFragmentを使用してモーダルボトムシートを実現することができます。
BottomSheetDialogFragmentはモーダルボトムシートです。
これは、 DialogFragmentバージョンで、フローティングダイアログの代わりにBottomSheetDialogを使用してボトムシートを表示します。
断片を定義するだけです:
public class MyBottomSheetDialogFragment extends BottomSheetDialogFragment {

    @Override
    public View onCreateView(LayoutInflater inflater, ViewGroup container,
            Bundle savedInstanceState) {
        return inflater.inflate(R.layout.my_fragment_bottom_sheet, container);
    }
}
次に、次のコードを使用してフラグメントを表示します。
MyBottomSheetDialogFragment mySheetDialog = new MyBottomSheetDialogFragment();
FragmentManager fm = getSupportFragmentManager();
mySheetDialog.show(fm, "modalSheetDialog");
このフラグメントはBottomSheetDialogを作成しBottomSheetDialog 。
BottomSheetDialogを使用したモーダルボトムシート
BottomSheetDialogはボトムシートとしてスタイル設定されたダイアログです
ちょうど使用する:
//Create a new BottomSheetDialog
BottomSheetDialog dialog = new BottomSheetDialog(context);
//Inflate the layout R.layout.my_dialog_layout
dialog.setContentView(R.layout.my_dialog_layout);
//Show the dialog
dialog.show();
この場合、BottomSheetビヘイビアをアタッチする必要はありません。
デフォルトでExpandedモードでBottomSheet DialogFragmentを開きます。
BottomSheet DialogFragmentはデフォルトでSTATE_COLLAPSED開きます。これは、次のコードテンプレートの助けを借りて、 STATE_EXPANDEDまで強制的に開き、デバイスの画面全体をSTATE_EXPANDEDすることができます。
@NonNull @Override publicダイアログonCreateDialog(Bundle savedInstanceState){
    BottomSheetDialog dialog = (BottomSheetDialog) super.onCreateDialog(savedInstanceState);

    dialog.setOnShowListener(new DialogInterface.OnShowListener() {
        @Override
        public void onShow(DialogInterface dialog) {
            BottomSheetDialog d = (BottomSheetDialog) dialog;

            FrameLayout bottomSheet = (FrameLayout) d.findViewById(android.support.design.R.id.design_bottom_sheet);
            BottomSheetBehavior.from(bottomSheet).setState(BottomSheetBehavior.STATE_EXPANDED);
        }
    });

    // Do something with your dialog like setContentView() or whatever
    return dialog;
}
ダイアログアニメーションはわずかに目立ちますが、DialogFragmentをフルスクリーンで開く作業は非常にうまくいきます。